Work with a lead
Open a lead to see their details and consent, move it through your statuses, keep notes and tags for your team, email the person and delete the lead.
Everything about one lead is in a single panel. Click a row on the Leads screen — or View lead in a conversation — and it slides in from the right. Close it with the × at the top, or by clicking outside it.
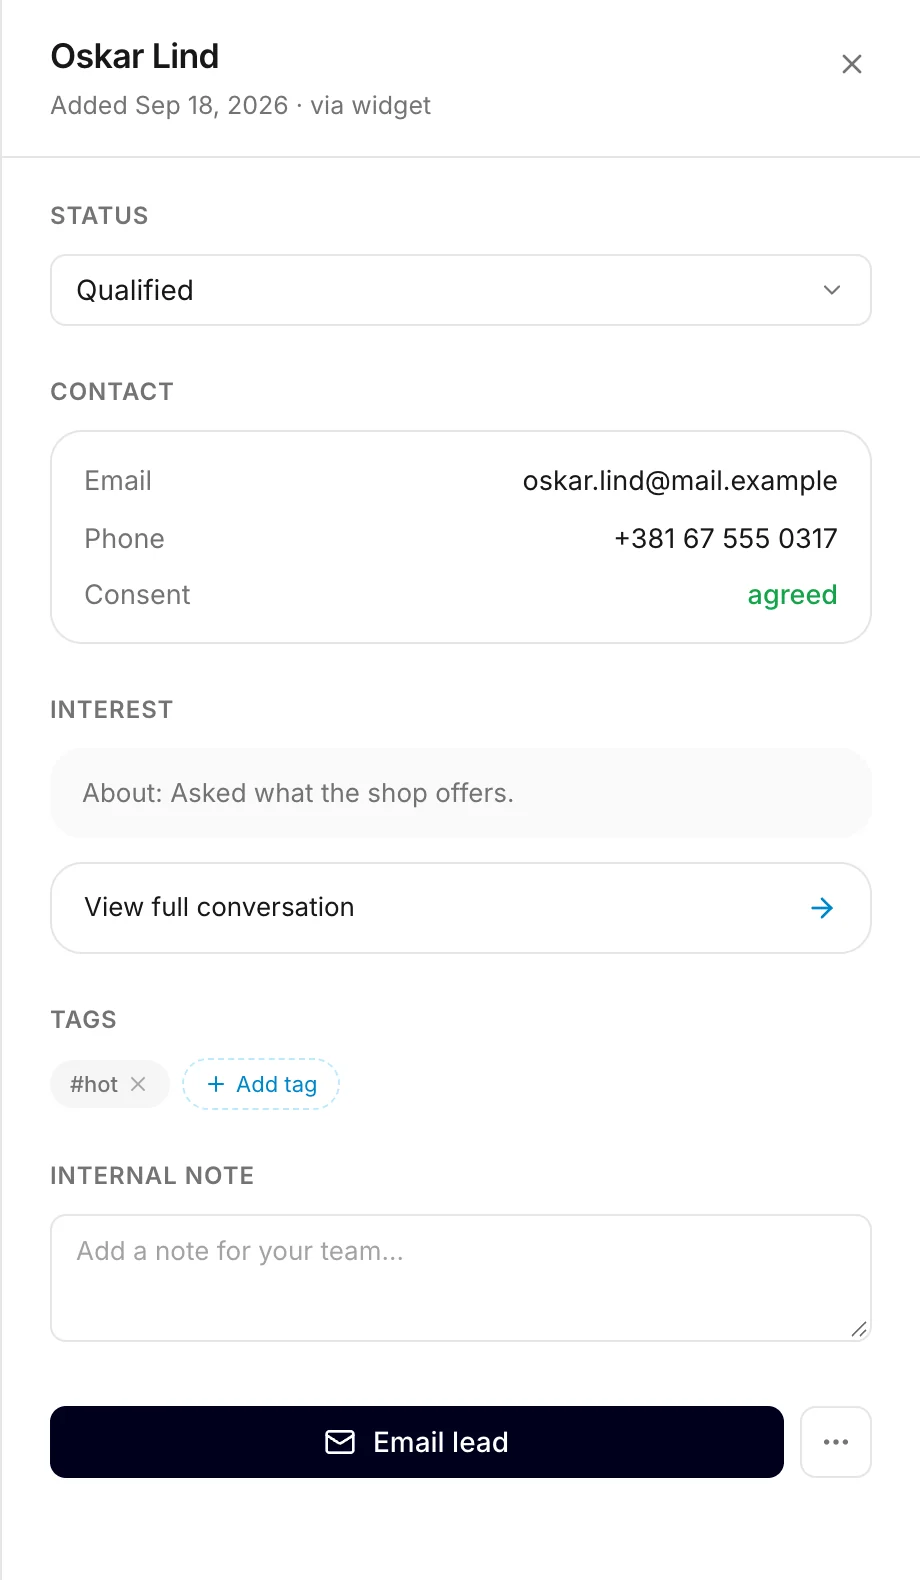
Under the name you see when the lead arrived. Every change you make in the panel is saved straight away — there is no save button.
Change the status
Pick a status from the list under Status: New, Contacted, Qualified, Won or Lost. See Statuses for what each one is for.
Contact details and consent
Contact shows the email address and phone number the visitor gave, or not provided for a field they left empty.
Consent shows whether the visitor agreed to be contacted:
- agreed — they ticked your consent checkbox before sending the form.
- none recorded — your form had no consent checkbox when they sent it. It does not mean they refused: while a checkbox is on the form, it cannot be sent unticked.
Under it, the panel shows the exact consent text the visitor ticked and the day they agreed, so you know what they agreed to. Leads from before September 2026 have no saved text. You set the consent text on the widget's Behavior tab — see Privacy and consent.
What they asked about
Interest is what the visitor wrote in the form's message box. When they left it empty, it shows the summary of their conversation instead, or No details captured. if there is none yet.
Click View full conversation to read the chat that led to the form — often the best way to prepare before you get back to them. When the panel says No linked conversation instead, the visitor sent the form without chatting first (for example while the chat was paused), or the conversation has already been deleted — conversations are kept for 90 days.
Tags
Tags work like tags on conversations: click Add tag, type the tag and press Enter; click the × next to a tag to remove it. The search box on the Leads screen finds leads by their tags.
Lead tags and conversation tags are separate — see Tag a conversation.
Internal note
Internal note is for your team: what you agreed on the phone, when to call back, who is handling it. Type into the box and click anywhere outside it — the note is saved and a confirmation appears. To remove it, clear the box and click outside it.
Only you and your teammates see the note. The visitor never does.
Email the lead
Email lead opens your own email program with a new message to the lead's address. You write and send it from there, as usual. The button only appears when the lead left an email address — for a phone-only lead, call them.
Konvuno does not see or keep the email you send, and it does not change the status for you. Move the lead to Contacted once you have written.
Tip
If nothing happens when you click Email lead, your computer has no email program set up to open such links. Copy the address from Contact into your webmail instead.
Delete a lead
- Click the ⋯ button — next to Email lead in the panel, or at the end of the lead's row in the list.
- Choose Delete.
- Confirm with Delete.
The lead's details are removed for good and cannot be brought back. The conversation it came from is not deleted. To delete several leads at once, see Delete several leads.
How other businesses use it
- A driving school writes the agreed lesson time in the internal note, so whoever picks up the phone next knows what was promised.
- A photographer reads the conversation before replying, and quotes the visitor's own question in the first email.
- A roofing company tags leads by area —
north,south— so each crew leader can search for their own. - A financial adviser checks the consent line before calling anyone back.