The chat widget
What the widget is, how it works on your website, and how to go from a first draft to a live assistant.
The widget is the chat bubble your visitors see on your website. When someone clicks it, a chat panel opens and an AI assistant answers their questions — using only what you taught Konvuno about your business: your FAQs, your business description and, if you sell something, your catalog.
You design the widget once on the Widget screen, put one small snippet on your website, and from then on every change you publish reaches your site automatically. You never have to touch your website's code again.
How it works
- A visitor opens a page on your website.
- The snippet loads the widget and asks Konvuno for your published settings — colours, logo, greeting, languages.
- The visitor clicks the launcher and asks a question.
- The assistant answers from your approved knowledge. If it cannot, it can offer to connect the visitor with you, or ask for their contact details. See What your visitors see.
- The conversation appears under Conversations, and any contact details under Leads.
Note
Your website only ever shows the version you published. Everything you change on the Widget screen stays a private draft until you click Publish, so you can experiment without your visitors seeing anything half-finished.
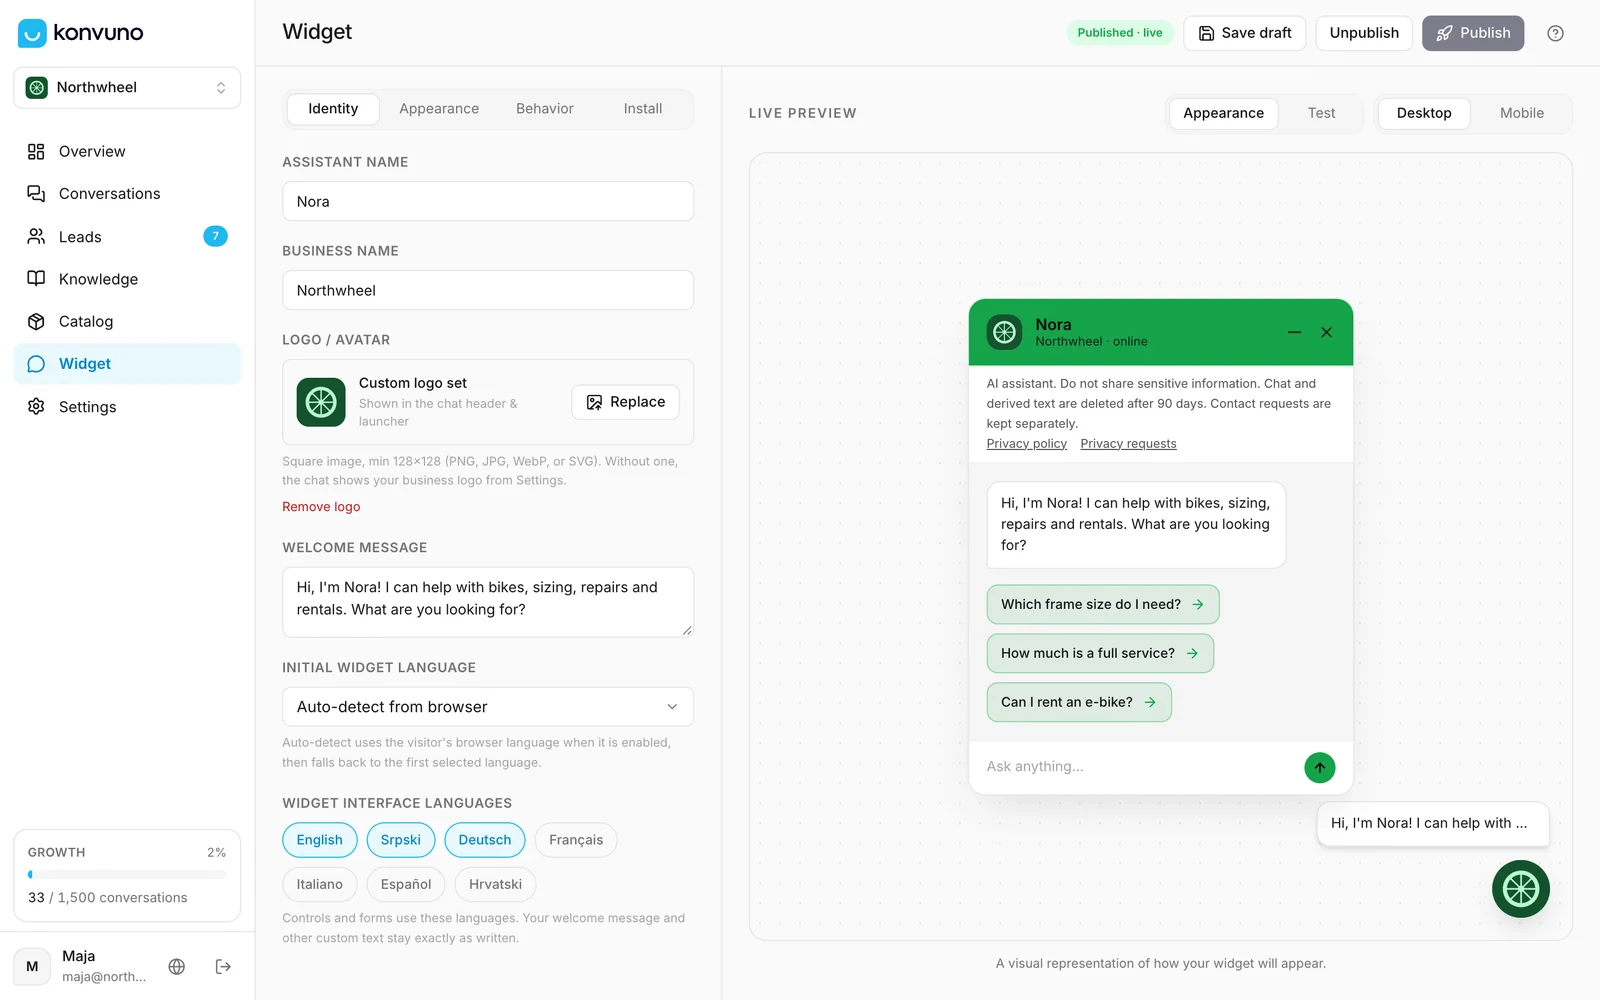
The Widget screen at a glance
The screen has three parts:
- The settings column on the left, split into four tabs:
- Identity — the assistant's name, your logo, the greeting and the languages. See Identity.
- Appearance — colour, theme, size and position. See Appearance.
- Behavior — tone, suggested questions, contact options, privacy and where the widget should stay hidden. See Behavior.
- Install — the snippet, step-by-step guides for popular website builders, and the list of domains allowed to show the widget. See Install.
- The preview on the right. It redraws as you type, and its Test mode lets you chat with the real assistant before anyone else can. See Preview and test.
- The buttons at the top — the status of your widget, Save draft and Publish. See Save, publish and take offline.

Go live in five steps
- On Identity, give the assistant a name, upload your logo and write a short welcome message.
- On Appearance, pick your brand colour and where the launcher sits.
- On Behavior, add two or three suggested questions and fill in how visitors can reach you.
- Try it in the preview's Test mode, then click Publish.
- On Install, add your website's domain and paste the snippet into your site — or send the snippet to whoever builds your website.
Tip
The widget answers best when it has something to answer from. Before you go live, add your most common questions and answers under Knowledge — ten good FAQs make a bigger difference than any setting on this screen.
Who can do what
| Action | Owner | Member |
|---|---|---|
| Change settings and save a draft | Yes | Yes |
| Upload a logo, manage allowed domains | Yes | Yes |
| Chat with the assistant in the preview | Yes | Yes |
| Publish | Yes | No |
| Unpublish | Yes | No |
Publishing also needs an active subscription. Without one you can still design the widget and test it in the preview; the Publish button stays disabled until you subscribe.
How other businesses use it
- A restaurant names its assistant after the house, answers "are you open on Sunday?" and "do you have vegan options?", and hands table bookings to a phone number.
- A dental clinic keeps the tone calm and professional, and hides the widget on its patient-portal pages.
- A web shop turns on catalog recommendations, so "do you have this in blue?" gets a product card with a link.
- A software company keeps the widget off its logged-in app pages and asks for an email before handing a demo request to the sales team.